How to recover lost files from android ?
How to Recover lost Files from Android ?
Sometimes we remove some important files or data. As many people use the android smartphone and keep their important daily use files or data in it.
But what if you delete some valuable data on your android ?
There are lots of applications available on the internet on a particular thing but how to choose best one among them ?
So, today I’m sharing the top best android data recovery tools that will help you to recover deleted files on android.
The
most important thing to know about Android data recovery is that you should stop using your phone as soon as possible. This will give you the best chance of getting your file back if it is really lost.
#1 Dumpster

The dumpster is similar to the recycle bin in your PC. It is one of the best equipment for restoring accidentally deleted documents from your android device. It can recover all deleted files from your smartphone. It additionally easy to use due to it’s user-pleasant interface.
It has the following features :-
Restore deleted pictures, music files,
videos and pretty much almost any file type (pdf, mp3, doc, Avi, mp4, jpg, png, rar, ogg, txt and much more :-
- No Rooting needed but if you do, you get improved performance.
- Internet connection absolutely not required.
- NEW: Recover uninstalled apps and backup files with a single tap.
- Preview deleted photos, videos, and audio files before recovering.
- Send files to Dumpster using “share” or “send to” from any file manager or gallery app out there.
- Scheduled auto-clean of old deleted items.
- Protect your privacy with a special lock screen and access restriction.
Note: It can recover only when it is already installed on your android before the delete of your files/data.
#2 ES File Explorer
The another method to restore deleted files is one of the best android file managers. This file manager is full of features and one of them is Recycle Bin. I will also recommend you to use this application as the file manager. You can easily find the Recycle Bin option just by opening its tool menu. You have to switch it ON to use the Recycle Bin option.
ll Method :- Recover Files Deleted by ES File Explorer with Third-party Software
In this method your mobile should be rooted if your device is not rooted you can also bypass the root verification or root it. If your Android device hasn't been rooted, MiniTool Mobile Recovery for Android will prompt you to root it.
Courtesy :- MINITOOL
Here, you can use MiniTool Mobile Recovery for Android to undelete files saved on your Android phone or tablet.
This program is available on Windows 10/8.1/8/7 and it can be used to recover photos, videos, audios, contacts, messages, documents and more from Android phone or SD card with its two powerful features.
Besides, it supports multiple Android phones and tablets, such as Samsung, Huawei, Google, LG, Sony and more. Now, get its Free Edition from the following button and install it on your computer to have a try if ES File Explorer deleted your files/photos by accident.
Directly Do Data Recovery from Android Internal Storage
- Step 1: Select a proper recovery mode
Double-click on the icon of this free Android data recovery software on your computer and then you will enter its main interface, as shown below.

- Step 2: Analyze the Android device
Here, you can find there are two features. To recover files deleted by ES File Explorer from Android phone internal storage directly, please click Recover from Phone on the left side.
MiniTool Mobile Recovery for Android will start analyzing your Android phone or tablet after connecting the device to your computer via USB cable.

- When you perform ES File Explorer data recovery, note that no other Android phone management software is running. Or else, a recovery failure may appear.
- Step 3: Enable USB debugging
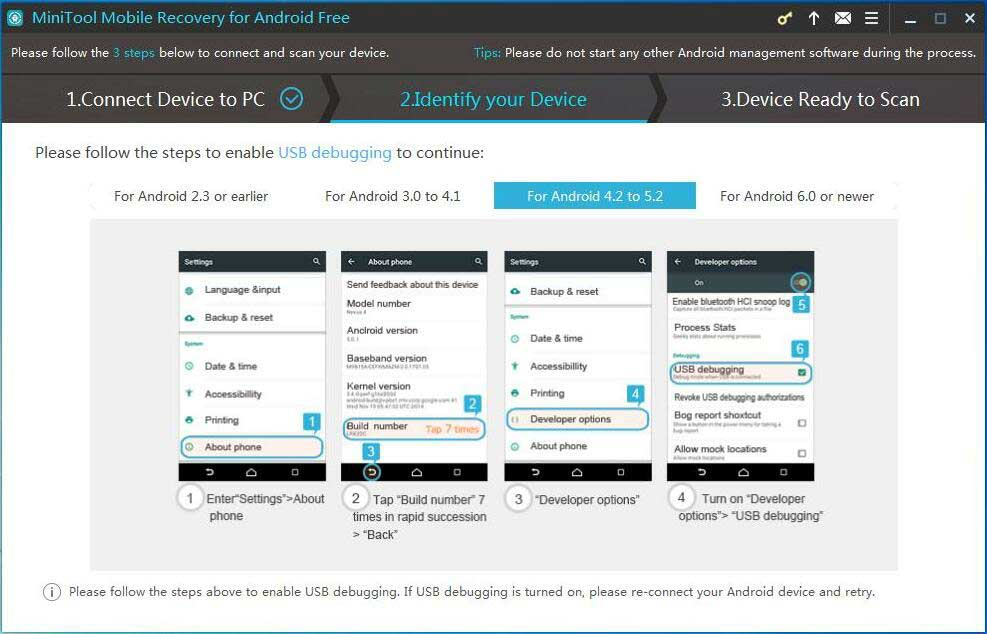
Next, you are prompt to enable USB debugging. From the figure below, you know the ways are different from Android versions. Thus, please choose a proper one based on your need.

- Here take Android 4.2 to 5.2 as an example:
- Enter Setting to find About phone.
- Tap Build number for seven times in rapid succession and then click Back button.
- Click Develop options under the Settings tab.
- Then in the options interface, find USB debugging feature to enable it.
- Step 4: Allow USB debugging
If you connect your Android device to the computer for the first time, USB debugging authorization is required. Please check Always allow from this computer option and click OK on your phone or tablet to avoid authorization next time.

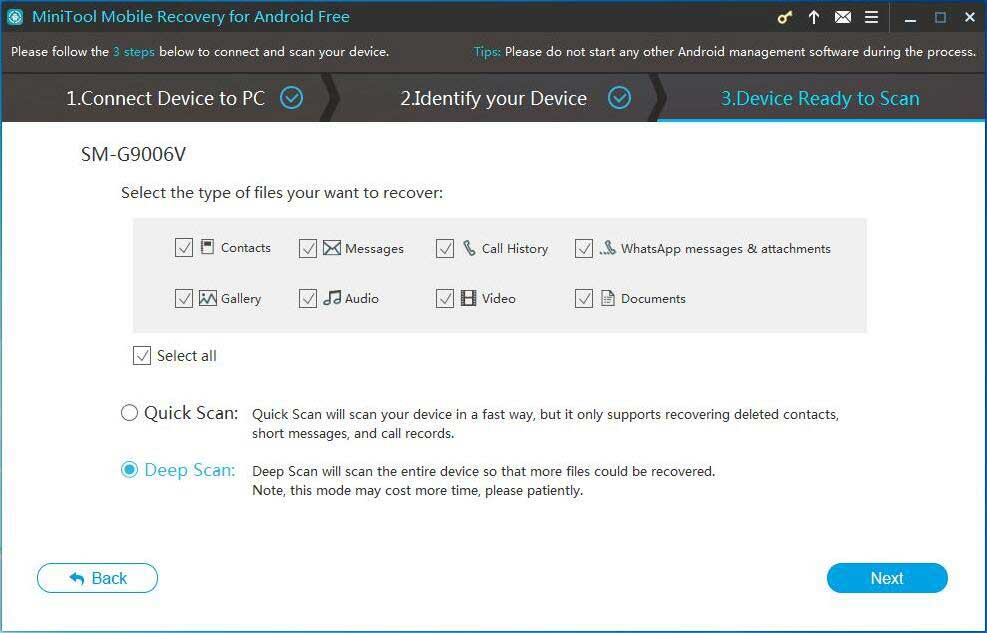
- Step 5: Choose a suitable scan mode
- Quick Scan: It can help to scan your Android phone or tablet in a fast way. With it, you can only recover contacts, short messages and call records deleted by ES File Explorer. Note that this mode allows you to uncheck the file types you don't want to recover.
- Deep Scan: it helps you to scan the entire Android phone or tablet so that more files could be recovered. But, this scan mode may cost much time, thus, please wait patiently.
This program provides you with two scan modes for ES File Explorer data recovery:
Note that this mode doesn't allow you uncheck the file type you don't want to recover.

- Step 6: Scan your Android device
Then, MiniTool Mobile Recovery for Android will start to scan your device. To recover files deleted by ES File Explorer well, you had better not click Stop button before the scan process is completed.
- Step 7: Check the items you want to recover
Then, you will find all the found data types are marked in blue and the file types that are not found are marked in gray by this Android data recovery software. And you can click one file type and then choose one file to view whether it is the one you want to recover.
Here, if you want to recover deleted photos, please click Camera, Screenshot, App Picture or Picture. Then, check 10 items of each file type each time you need for ES File Explorer data recovery by hitting Recover button.

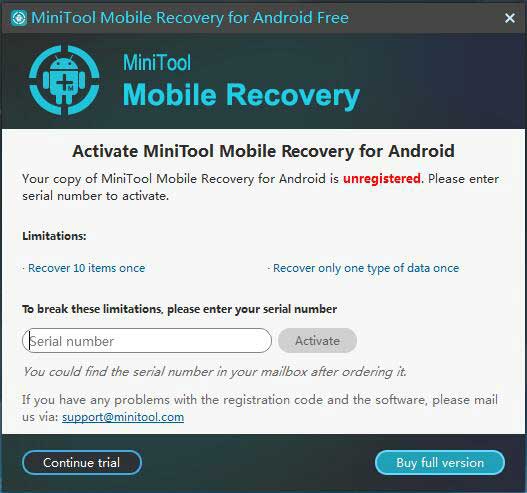
The Free Edition of MiniTool Mobile Recovery for Android can only help you to recover 10 files of one type each time. In order to recover files deleted by ES File Explorer without recovery limitation, we recommend using its advanced edition.
After getting the license, please register this program in the scan result interface by clicking register icon. Then, in the pop-out window, input the code you have got to activate this software for more files recovery.

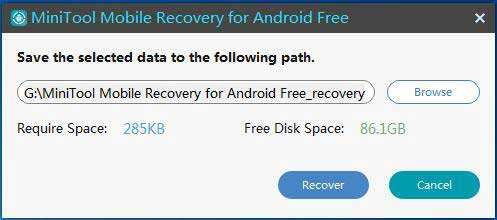
- Step 8: Determine a storage path Then, a default path is offered. And you can also click Browse to specify a storage path. Finally, click Recover button to perform the file recovery operation

#3 Using PC
So, i have already above explain you how to recover deleted files from Android with pc but i am mentioning one more method for non-rooted devices. I am using fonepaw because it doesn't need root access.
STEP 1. Connect Android to PC
To start with, install and run the phone memory recovery for Android on your computer. Then connect an Android phone, such as Samsung Galaxy S7/S8/S9/Note 9 to PC with a USB cable. USB debugging needs to be enabled on your Android phone for the Android Data Recovery program to communicate with the phone. Follow the on-screen instruction to enable USB debugging.
STEP 2. Choose File Types to Recover

After USB debugging is turned on, the Android phone is successfully connected to the program, you will be asked to select file types that you want to restore. Tick documents, photos, messages or other deleted files that you need, and then click the Next
button.
STEP 3. Install FonePaw App to Get Permissions

The program will prompt you to install the FonePaw app, an app that is used to grant privileges for the program to access files on your Android. Only by using the app can the desktop program read and recover deleted files from your phone.
Therefore, follow the on-screen instruction to enable Install via USB and allow the FonePaw app to be installed on your phone.
STEP 4. Get the Privileges to Scan Deleted Files


After the FonePaw app is installed, it will give the pop-up notification for you to allow access to contacts, messages, storage, call logs to scan out deleted files. Tap Allow to all messages and click Scan Authorized Files to begin searching for deleted files on your Android phone.
Step 5. Check Deleted Files Under Standard Scan

Once the program gets permission, it will start a standard scan, which can find out thumbnails of deleted photos as well as existing files on your Android phone. If you need to find more deleted files, click Deep Scan and wait patiently for phone file recovery to finish.
STEP 6. Recover Lost Files from Android Under Deep Scan

When Deep Scan is finished, all your Android files will be displayed. To look at only the deleted files, tap the ON
icon on the top to set to display the deleted items only. Select the deleted files that you are looking for and click Recover
. The deleted files will be retrieved and saved on your computer.
Tip: After saving the deleted data, you can put the data back to your Android phone by transferring data between mobile phone and PC.
Nextbutton.
Therefore, follow the on-screen instruction to enable Install via USB and allow the FonePaw app to be installed on your phone.
ONicon on the top to set to display the deleted items only. Select the deleted files that you are looking for and click
Recover. The deleted files will be retrieved and saved on your computer.


Comments
Post a Comment